Sunday, December 13, 2009
You don't make friends with salad!
In my defense, I had spent the better part of the afternoon drinking beer and eating BBQ shapes in the park for my sister's birthday, so it's not that I didn't want to cook up a storm, so much as I just didn't have the time.
That having been said, it was a very successful dinner. I love having friends who love to eat - not in a really foodie, always searching out the hottest new chef or fanciest, most obscure ingredient kind of way, but in the, let's sit down and consume lots of tastey food and delicious wine all together kind of way.
Unfortunately I didn't manage to get many photos of the dishes I prepared, and the ones I did take weren't fantastic. But, in the interest of conscientious food blogging. Below is a shot of all the dishes served last night (except for dessert.) Clockwise from far left we have:
- roast beetroot, goats cheese, walnut and mixed leaf salad
- homemade humus (I haven't quite perfected that yet)
- zucchini and ricotta tart in a parmesan crust
- white bean, carrot and dill salad
- homemade roast eggplant and yogurt dip
- cheese
- cabbage, raddish apple and mustard seed coleslaw
The only non-salad item on the menu was a the savoury tart. Adapted from one of Heidi's recipe at 101 cookbooks - I'd made it once before with a wholemeal flour and olive oil crust but decided to get a little bit more decadent this time around and use another of Heidi's recipes for a parmesan crust. Sadly, even with the helped of a loaned food processor, the pastry dough recipe just didn't work for me. My dough never really came together properly and stayed kind of pebbley and sandy even when I was trying to squish it into the pie dish. Hmmm - so the recipe that I've given here is with a couple of my amendments to the pastry recipe and a couple of additions to the fillings.
Zucchini and Ricotta Tart
Adapted from 101 cookbooks
Pastry:
1/2 cup plain flour
1/2 cup wholemeal flour*
120g cold, unsalted butter chopped into 1cm cubes
120g good parmesan, finely grated
1/2tsp salt
2tbs ice cold water
1 egg yolk
Preheat the oven to 180c
Put the flours, salt, butter and parmesan in the bowl of a food processor and pulse a couple of times till it's just combined and some of the butter is still in pea sized pieces. Add the iced water 1 tablespoon at a time, and pulse a couple of times after each spoonful. Now add the egg yolk and again pulse until just combined.
The dough should come together when you pinch it between your fingers.
Pour the dough into a pie dish and quickly and firmly press it into the shape of the dish, pushing the dough up the sides of the dish as well.
Pop the dish in the fridge for 15 minutes. Pull it out, prick with a fork a couple of times, place a piece of silver foil over the pastry and weigh down gently with pie weights or dry beans. Pop it into the oven for 15 minutes. Take the pastry out of the oven, remove the foil and weights and continue baking for another 10 minutes or until the pastry is golden brown and smells delicious!
Allow to cool at least a little before filling.
*You can always use just plain flour for this recipe - the wholemeal flour just makes it a little bit more rustic. However, if you do use only plain flour I would omit the egg yolk from the recipe because it will probably make the dough too wet.
Filling:
2 medium zucchini - sliced into rounds as thinly as possible
2 cans chopped tomatoes
2 cloves garlic -sliced
2tbs olive oil
300g fresh ricotta
1tsp salt
1/2tsp red chili flakes
handful fresh basil
Either keep the oven hot from baking the pastry or preheat again to 180c
Place the chopped zucchini in a colander and sprinkle on a fair amount of salt. Leave the zucchini to sweat while you start the sauce.
In a small pot, heat up the oil, garlic and chili until it starts to get fragrant, but not allowing the garlic to burn.
Dump in the cans of tomato and simmer for 15 minutes. Salt to taste.
Pick up handfuls of the zucchini and squeeze them well to try and get rid of any excess moisture that's in them.
Take your cooked pastry crust and spread about half the ricotta on the bottom. Then spread about one third of the tomato sauce, followed by about half the zucchini and half the basil, roughly torn. Repeat this process and finish with the last 1/3 of tomato sauce on the top.
Pop it in the oven and let it cook for about 30mins.
Serve warm to friends or cold, directly from the fridge the next morning when you're faced with a sink full of dishes and need some courage!
For those of you who have perservered with this post all the way to the end of the recipe - you will now be rewarded with another photo - nothing food related, just some lovely flowers that have been sitting on the ledge above my kitchen sink the last couple of days... they're really very pretty!
Friday, December 4, 2009
Didn't your mother ever tell you...
Mine did – but that didn’t stop me gorging myself on kilos of them last weekend when we went cherry and berry picking in Silvan, near the Dandenongs, about 45 minutes outside of Melbourne.
We paid $7 entry to cover the cherries that we would eat whilst picking (oh boy did I make sure I got my money’s worth), were handed a bucket and pointed in the direction of heavily fruit-laden cherry trees at the end of the track.
Ever wondered why cherries are so bloody expensive? It’s because picking them is a seriously labour intensive activity! It takes a loooong time to fill 2 buckets with cherries, especially if like me, you adopt the “one for you, one for me” method of picking.
After the cherries came the blackberries and raspberries. What a revelation! What amazing, beautiful, tasty little morsels! I hate to sound so much like an inner-city girl, but seeing those deep red berries peeking out from behind the bushy leaves, looking like, well, flowers, and then popping them in your mouth and realising that it’s actually a raspberry, like, the same thing that comes in punnets at the supermarket seemed a little ridiculous but very wonderful!
We headed home with our bountiful bounty, stuffing a few more cherries and berries into my mouth on the way. Once home, I had rolled around on the floor for a while emitting cherry-tummy-ache induced moans and groans, and then decided that 7kg of fruit is too much for regular human consumption. There was only one thing for it – a jam session! After a quick tribute to Bob Marley, we got down to business: the very messy business of pitting cherries and the very dangerous business of sterilising jars.
Jam is really an incredibly easy thing to make – it’s really just equal quantities of fruit and sugar, juice of a lemon or two (and if it’s fruit without a lot of natural pectin – like cherries) a bit of extra pectin or jamsetta which you can easily pick up from the supermarket.
To quote my fellow jammer, “jam-making is an easy but fraught process” – so I’ve taken lots of photos for you to follow.
Home-made jam is an entirely different thing to supermarket jam! For one thing, it tastes like fruit rather than sugar, for another it's totally natural and therefore healthy ;) - so what are you waiting for? Don an apron, boil some jars, and get jamming!
For cherries, and all stone fruit the first step is to pit all the fruit. With cherries this can be a very messy business. I was lucky enough to be using an olive pitter which made life much easier, nevertheless it took about an hour to pit 3kg of cherries!
Next, throw all the fruit in the biggest pot you have along with an equal quantity of sugar - so we had 3kg of pitted cherries and 3kg of white sugar.
Put the pot onto a very low heat - you don't want the sugar to burn at all. Let the whole thing heat up very very slowly, stirring occasionally. The sugar will begin to dissolve and the cherries to release juices so it will start looking delicious and syrupy. At this stage, squeeze in some lemon juice - we used 2 lemons.
Continue to heat it all up, stirring to make sure it doesn't stick to the bottom and eventually the mixture will begin to hubble and bubble. At this stage, if you're using jamsetta/extra pectin, throw it in. Also, you'll find that the boiling produces a fair bit of foamy "scum" that rises to the top. Even though for us it was a hot pink foam that looked quite delicious, we skimmed it off because that's what you're meant to do when you're jamming.
To test if the jam is ready, splodge a bit on a plate and pop it in the freezer. If, after about 30secs the jam comes out set (no longer liquid but not quite a solid) your jam is ready. And so begins the dangerous part!
Gently and carefully remove all the jars that you've been sterilizing (by boiling on the stove for a while) from the hot water and place on a heat-proof surface.
At this stage you want to act as quickly as possible to make sure the jars are still hot and sterile when you pop the jam in. Quickly and carefully ladle the jam into the jars and wearing gloves or using a couple of tea towels, screw the jar lids on tightly.
Give the jars a good clean (because they'll inevitably get disgustingly sticky) and leave them on the benchtop to cool over night.
And taadaa - Jam!
Enjoy on toast, in baking, from a spoon or any other usual jam enjoyment activities which I will leave up to your imagination.
Wednesday, November 25, 2009
I love you, dessert.
We were sitting on my parent's porch, enjoying the sunshine after a particularly indulgent Italian feast in honour of my birthday, and he just popped the question! I looked at him, somewhat startled, and then my eyes rested on the now scrapped clean dish sitting next to him on the table – it was the dish that once contained tiramisu – my tiramisu – and it all made sense. After all, while the old saying might be “the best way to a man’s heart is through his stomach”, I think “the best way to a man’s heart is through his taste buds” might be more accurate!
Lunch that day was a seriously Italian affair that I had spent 2 days cooking up. Bruschetta, homemade pasta, cherry tomato sugo – which required the painstaking de-seeding of about 2kg of cherry tomatoes, homemade pesto, cheese plates, salads and the crowning glory – two enormous tiramisu! Tiramisu good enough to make you fall in love!
To be completely honest, unlike some of my other Italian fare, I didn’t pick up my tiramisu recipe from anywhere authentic, but rather from a beautiful Italian cookbook my sister gave me.. Nevertheless, it's a recipe that proved seriously successful time and again, and now that I’ve moved out of my parent’s home and that cookbook sadly remained behind (I really should remember to re-claim it next time I’m there) its simple perfection has stayed with me and I no longer even need the recipe to whip one up.
So, for a while, I made my tiramisu at every opportunity, every birthday, picnic, family dinner or general event that called for dessert, I beat some eggs, brewed some coffee and dunked a couple of savoiardi. And then I don’t know what happened but tiramisu kind of disappeared from my repertoire, that is, it had disappeared, until last weekend, when another old friend who was obviously missing the good old days of layered Italian desserts, requested a tiramisu for her end of exams/birthday dinner party.
Even without the cookbook – the tiramisu came back to me like an old friend, once again I beat some eggs, brewed some coffee and dunked a couple more biscuits.
When dinner time came around, my tiramisu was delicious as ever, slightly sweet, a little bitter, lightly boozed and very creamy. In fact, I think it was probably delicious enough that those left over biscuits in my pantry will making another appearance as tiramisu in the not too distant future!
Tiramisu
Makes 1 enormous tiramisu, 2 smaller ones or about 15 individual tiramisu if you want to do them in pretty glasses or ramekins.
Ingredients
8 eggs separated (the eggs in tiramisu are raw, so get the freshest possible free range eggs you can – like those gorgeous yolks you can see in the picture above)
150g caster sugar
750g mascarpone
3 cups strong brewed coffee (plunger or espresso coffee diluted)
3tbs brandy, sweet Marsala or booze of choice
100g dark chocolate, finely grated
2 packs Savoiardi (lady/sponge finger biscuits) – about 40 biscuits
Method
Beat the egg yolks with the sugar until it becomes thick and pale.
Beat the egg whites in a clean, dry bowl with a pinch of salt until it forms soft peaks.
Whip the marscapone (about 1/3 at a time) into the egg yolk mixture.
Gently fold the egg whites into the yolk/marscapone mixture (you probably need to do this in about 4 batches) Be as gentle as possible at this stage, try and keep as much of the air in the mixture as possible.
Mix the brandy into the coffee – it should taste like very strong coffee and quite strongly of brandy, the flavour of the alcohol will mellow as the tiramisu sets in the fridge.
One at a time, dunk the biscuits into the coffee mixture. The trick is to get them nice and sodden without them falling apart. I like to do 4 seconds on each side, although it probably depends on the size and brand of your biscuits.
Layer the bottom of a clean baking dish with the soaked biscuits.
Spoon over about half of the marscapone mixture.
Repeat in layers until all biscuits and marscapone are used up (the last layer should be
marscapone not biscuit) I usually only do two layers of each.
Pop it into the fridge for at least 2 hours, but preferably 8 or even overnight.
Sprinkle the grated chocolate over the top just before serving.
Monday, October 26, 2009
A neanderthal dessert
So, we’ve obviously become more generous with our Savta-sharing over the past 20 years because last week we shared a special and all too rare baking afternoon with a couple of friends who were dying to learn her magical ways with yeast.
The cake of the day was Caveman Cake – which I think is actually supposed to be called something like Dumpling Cake – a Hungarian specialty that we have thus named because you never cut the cake, but rather rip off chunks with your hands and gobble as quickly as possible.
Thea brought along her wonderful fancy camera and was nice enough to take photos of the whole process for me – so I’ll try to illustrate the recipe as best I can with her gorgeous shots.
Caveman Cake
The thing with this cake is that it’s about perfecting the dough, which isn’t hard work but might mean a couple of failures and a couple of mediocre cakes before you get things right. The wonderful news is that when you’ve got this dough right, you can also use it to make delicious homemade donuts!
Dough
6g dry active yeast
1 tsp sugar
2tbs warm water
400g flour
2 egg yolks
50g butter (although Savta always uses margarine to make the cake suitable for eating after a meaty Friday night dinner, in accordance with Kashrut laws around mixing meat and milk)
250ml tepid water (for a richer cake you could substitute this with milk)
1 tsp salt
2 tbs caster sugar
¼ cup canola oil plus a bit more for greasing
Filling
120g walnuts
4-5 tbs apricot jam
100g sugar
Zest of 1 lemon
Mix the yeast, tsp of sugar and warm water in a large bowl and leave aside to proof.
Add all other dough ingredients to the bowl.
At this stage if you’re lucky enough to have a bench-top mixer, stick it in there with the dough hook attachment and let it go on medium for about 3 minutes.
After 3 minutes, slowly add the oil in a thin stream and let it be incorporated into the dough.
If you’re doing this by hand, it will be quite a wet, sticky and soft dough, so rub a bit of oil onto your hands as you work. You’ll probably have to knead for about 10 minutes and then slowly incorporate the oil.
Now it’s time to leave the dough alone in a warm place, let the yeast do its work and relax with “something prepared earlier” and a cup of tea.
Although there is a little bit of work to be done now – grind up the walnuts in the food processor and mix it with the sugar and lemon zest. Also, preheat the oven to 200c.
Once the dough has doubled, or even almost tripled (usually about 1 - 1.5 hours), tip it out of the bowl onto a well floured surface.
Handle the dough as little as possible because you want to keep all that precious air in there but flatten it out a bit to about an inch thick.
Using a cookie cutter or glass cut circles of dough out – make sure you use all the dough, fashioning odd shaped bits out of the cut-offs - because Savta would be very disappointed if you threw anything out!
Take a large, deep cake tin (any shape will do, Savta always uses a big square one) and sprinkle a bit of oil on the bottom.
Place a layer of the dough rounds on the bottom of the pan – they don’t need to overlap, and don’t even really need to touch because it’ll grow again before it goes in the oven.
Pop about a teaspoon sized blob of apricot jam on each round and sprinkle over half of the walnut mixture.
Repeat until all dough rounds have been used up – don’t put jam or walnut on the top layer, just brush it with some egg white or milk.
Leave the cake like this for about 20 minutes to rise a bit more and pop it into the hot oven for about 30mins or until it’s golden brown and springy to touch.
Pull it out of the oven, turn out onto a cooling rack.
Enjoy, tearing apart with your fingers as soon as it’s not going to give you third degree burns (although, even that would be worth it!)
Saturday, October 17, 2009
Cheesy Potato Cure
The term “Cheesy Potato” was coined what seems like an age ago when my lovely sister flew half way around the world to save me from dying of a broken heart, all alone, in Italy. Ok, so I was nineteen and probably a little melodramatic, but it was definitely a sad and lonely place to be.
We met up in Barcelona for what turned out to be a wonderful 10 days or so of touring, talking, drinking, healing and, of course eating. Only problem is, Spain is not such a friendly place for the vegetarian and over the course our time there we ate more bread, egg, potato, cheese and miscellaneous fried stuff than anyone could ever wish to. Not to mention all washed down with plenty of cerveza (which is really just more bread in liquid form!)
It was one day when we'd been wandering the Alhambra in Granada for untold hours and the lack of food was beginning to make us both a little hangry (hungry-angry) that we relented and ate a boccadillo (don't be fooled by the fancy name it is, you guessed it, bread filled with egg and potato) from the touristy food stall just outside the Alhambra. It was gross – stodgy, dry and greasy all at the same time. After inhaling the whole thing, Thea groaned “Urgh, I feel like a cheesy potato!” And so, a legend was born – from that point on, whenever too much unhealthy food has been consumed, we cry “Cheesy Potato”!!!
Now, there are a number of ways to cure this particular feeling. Often something as simple as a tart apple or a stick of celery will suffice to freshen up your insides and make you feel clean and sparkly again, but sometimes, a quick fix just won't do and a whole meal must be devoted to scrubbing the cheesy potato out of your system. These times call for something that make you feel virtuous and taste delicious, something that tastes green, something like the salad I made this week for dinner, and then again for lunch. Inspired by the sorrel I bought from the farmers market and the red quinoa bestowed upon me by Dave's mum, this salad was the perfect cure for my cheesy potato feeling brought on by an indulgent weekend in Tasmania and too many lunches and dinners out and about.
The beauty of this salad is that it is substantial enough to eat for dinner, stays fresh left overs, and lends itself very nicely to whatever variations of vegetables you have in your frigde – although I would have to say that if you can find a nice bunch of sorrel, use it – it's tangy and zingy yet earthy flavour is really something special.
Cheesy Potato Cure Salad – or Sorrel and Red Quinoa Salad
1 bunch fresh sorrel, washed, dried and cut into ribbons (you could also use rocket, spinach or a mixture of all three)
1 cup red quinoa (or other quinoa)
1 bunch spring onion, chopped into 1 cm pieces
½ avocado, sliced
1 small cucumber, chopped into half circles
1 tomato, diced
1 bunch asparagus, briefly blanched or steamed and chopped into 2cm pieces
100g feta cheese (optional)
Vinaigrette
1 tbs dijon mustard
3 tbs white wine vinegar
5 tbs olive oil
Rinse the quinoa well under running water for a minute or so (then take a shorter shower that night to off-set the guilt of running the tap for so long)
Pop the rinsed quinoa and 2 cups of water in a pot on the stove. Bring to the boil, stirring occasionally then reduce to a simmer, pop on a tight fitting lid and let it cook until almost transluscent and tender and all the water is absorbed. My packet of quinoa said 10-15 minutes but it took more like 20mins.
In the meantime, prepare all the veggies and whisk together all ingredients for the dressing in a small bowl.
Dump everything (except feta) into a big bowl, and pour all the dressing on top – toss well – at this stage, if you're not going to use the feta, add some salt to the salad too.
Crumble some feta on top and enjoy straight from the serving bowl.
Serves 2 people for a light dinner and the perfect cure to cheesey potato guilt.
Tuesday, October 13, 2009
Many kinds of happiness
The wonderful thing about dumplings is that they come in so many different types and appear in so many different cuisines that you can be dumpling happy almost anywhere at any time of day!
There are dumplings that you eat down laneways in the city, drowned in vinegar and shared with friends, beer and a couple of rats. There are dumplings that you eat at your grandmother’s house which are doughy and crumbed and filled with sour plum jam so you’re never entirely sure whether they’re sweet or savoury.
And then there are dumplings that are more your style, full of ricotta, silverbeet and swimming in rich tomato sauce. Dumplings called malfatti that you make yourself and serve at home, inflicting serious dumpling happiness on your family and friends. For me they are the best dumplings of all!
Last night I cooked dinner at my parent’s place for my family and thought that these delicious (mostly) light little balls of ricotta and silverbeet would be the perfect food to serve up to a big hungry crowd. As it turns out, making these en masse is a fairly arduous task that included almost a kilo of ricotta, de-stemming steaming and chopping about 2 kilos of silverbeet and lots and lots of ball rolling. While some of the gorgeous little dumplings came out a bit soft and others a bit hard, they were, on the whole very yummy – particularly when paired with Marcella Hazan’s Crazy Tomato Sauce and some freshly grated parmesan. Here, I've been realistic and given a recipe that will generously serve 2 rather than 6 people.
Like all things dumpling, these should probably be enjoyed in moderation, but will more likely be scoffed and result in sighing and belly grabbing. It’s worth it, but don’t say I didn’t warn you!
Ricotta and Silverbeet Malfatti*
1 small(ish) bunch silverbeet (or rainbow chard or spinach etc)
350g fresh ricotta (not from the tub, it’s too wet)
2 eggs
1 ¼ cup plain flour
¼ cup grated parmesan
Salt, pepper and nutmeg to taste
Trim the silverbeet to remove the stems and any thick white veins so that you’re left just with the leafy bits.
Steam or briefly sauté in a bit of water for about 5 minutes until properly wilted.
Transfer to a bowl to let it cool until you can handle it then squeeze out as much moisture as possible. Finely chop the silverbeet and squeeze again (and again and again) to make it as dry and finely chopped as possible.
In a clean bowl mix together all the ingredients (but only a small amount of flour, about ½ cup)
Once well combined it should be wet but not too sticky, keep working in flour bit by bit until you have a dough that you can work into little balls without making a massive mess. At the same time, the more four you add, the chewier the dumplings will be, so this may take a couple of attempts to perfect.
Lay out a sheet of waxed baking paper, sprinkle with flour (I used semolina because I ran out of normal) and pop on a large pot of salted water to boil.
Take approximately ½- 1 tsp size pieces of the dough and roll into little balls, place on the baking paper - don't be tempted to make them bigger because they will swell a bit and these are the sort of thing that you just want to pop into your mouth, not cut in half first.
Once they’re all done, sprinkle a bit of extra flour on top of them all.
In two batches, gently plop the dumplings into lightly simmering water. When they bob up to the top, leave them for a minute and then pull them out with a slotted spoon. Repeat with the remaining dumplings.
Serve with rich tomato sauce, or some brown butter and sage and be dumpling happy.
* Malfatti means badly made in Italian - but I think mine looked lovely ;) these are also called Gnudi because they're like ravioli filling without the "jacket" of pasta
Wednesday, September 30, 2009
There's ricotta in my sausage!
Football in Melbourne is like fashion in Milan, or patisseries in Paris, or super-whitened teeth in LA, everyone should know something about it, and the more the better. So when the AFL Grand Final rocked around last Saturday I thought I should throw some sort of celebration for those of us who may otherwise be shunned for asking questions like "What happens when the ball hits the goal post and then goes through?" (That question really was asked, but I will save the offender mortal internet embarrassment and not reveal their name.) Plus, throwing a little party allowed me to experiment with cooking a bunch of party food that I would never otherwise make.
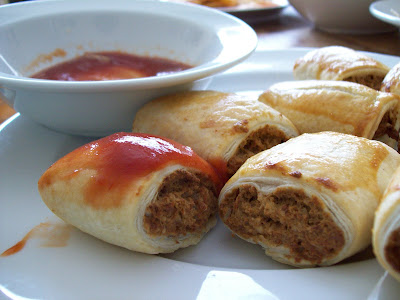
For the St. Kilda v. Geelong clash, Melbourne served up some classic freezing and hailing then sunny and shiny football weather and I served up some classic football party fare, complete with sausage rolls! Oh yeah! After all, who can watch the footy, drink beer and not eat something meaty wrapped in puff pastry - well, as it turns out, us! The entire party was veg friendly "sausage rolls" included - there were many who never even guessed at the deceit. Mwahahahaha.
As it turns out, we all ended up glued to my tiny, fuzzy TV screen by the last quarter, yelling at the players, calling the umpires rude names. As BJ pointed out, even if you don't care about footy, it is strangely addictive. Kind of like my other party snack success; cheese thins. (Good little segue there huh!?)
So, with a nail biting finish, and the last of the snacks polished off, my guests headed home for the evening - except for when we re-grouped about an hour later at 400 gradi in East Brunswick to munch down some pizza (like we hadn't eaten enough already!) but that my friends, is for another post.
Sausage Rolls
Adapted from Where's the Beef
"Sausage"
250g ricotta cheese (fresh not the one from the tub, it's too wet)
3 eggs
1 cup chopped pecans
1 medium onion finely diced
1 clove of garlic minced
3tbs soy sauce (don't leave this out, it's what makes it brown and look really authentic)
1 cup rolled oats
1/2 cup breadcrumbs
Puff pastry (if you were a wonderful person with bucket loads of time, you could make your own, but as it happens, due to an incident earlier in the day when I dropped an entire 6 pack of little creatures in Dan Murphys and had to flee the scene in tears of embarrassment, I had neither the time nor the will power to start the pastry process, so I bought some, and it was damn fine!)
Thaw out 3 pieces puff pastry and preheat the oven to 180c
Mix all the ingredients (except the pastry) together in a large bowl till it's at an eerily similar consistency to mince meat.
Take one piece of pastry and chop it in half.
Using one half at a time, put the filling down the centre of the pastry longways, then fold the long-side of pastry closest to you over the filling once, and then again, so it makes roll... You need to fold it in thirds like this, rather than just in half to get the sealed "roll" that you want.
Seal with a little milk or beaten egg if it's not sticking closed.
Repeat with the rest of the mixture and pastry.
At this stage your could cut some slits in the pastry and bake as is, but because mine were for a party I cut them into party sausage roll sized pieces, brushed them with a beaten egg and baked for about 20 mins.
Serve to unsuspecting carnivores with lots of dead 'orse.
Cheese Thins
Adapted from Chocolate and Zucchini
These were given the ultimate compliment at my party of tasting "exactly like those Phillipa's parmesan sables!" What else can I say but woohoo! Except for maybe, if something made with butter and cheese as its two main ingredients isn't drop dead delicious, you're probably doing something very wrong!
170g grated hard aged cheese (I used a particularly crumbly vintage cheddar that I buy from the market but the original recipe uses comte and I think pecorino or parmesan could be equally if not more delicious)
55g softened butter cubed
100g plain flour
1/4tsp salt
1/4tsp smoked paprika or freshly ground pepper or 1tsp carraway seeds - basically be imaginative, whatever goes well with cheese (um, everything!?) throw in a tsp
dash of milk (or I used a tsp of natural yogurt)
Pop all the ingredients (except milk) in a bowl and rub the butter into the flour and cheese like you're making pastry. It will start to resemble fine breadcrumbs. At this point, if your mixture comes together nicely as a dough, that's it, you're done. But if it doesn't quite come together, add a tiny bit of milk or yogurt just to bring it together into a ball of dough.
Form the dough into a nice log - it can be as fat or thin as you'd like, depending on how big you'd like your biscuits to be - mine where about the size of a 50cent coin.
Wrap the log in plastic wrap and refrigerate for at least 2 hours and up to 24 hours.
Preheat the oven to 180c
Pull the log out of the fridge, and slice it into very thin rounds. They won't all be even sized, but that's fine because as I discovered some people like the slightly thinner crunchier ones and others like the fatter softer biscuits. Personally I'm more inclined to the thinner, well baked variety.
Pop some waxed paper on a couple of baking trays and distribute the rounds - leave a bit of space because they will spread a tad.
Bake for 15 minutes or until golden brown.
Serve with beer and a major sporting event.
Tuesday, September 22, 2009
The pie period
Anyway, all this pie can weigh on a woman's mind (and other more external body parts) so when I found a pie that was made with pizza dough, rather than buttery pastry and stuffed chock full of broccoli in my favourite new cookbook - it was straight to the kitchen with me.
The pie I speak of is called Schiaciatta and it features in Rosa Mitchell's aforementioned book "My Cousin Rosa." The quantities that she calls for in her recipe would be fit to feed an army, or, probably, an extended family - but being just two people to eat, I cut the recipe WAY down, and still had enough for delicious lunch left-overs (it is really good cold with some cheese and a little salad on the side.)
Here's to healthy pie!
Broccoli pie
Adapted from Rosa Mitchell's My Cousin Rosa
Dough:
5g instant dry yeast
1/2 tsp sugar
230g plain flour or Italian pizza flour
1 tsp salt
2 tbs olive oil
1/2 cup water
Filling:
1 head broccoli - washed and chopped into small chunks (including stem)
2 green garlic (or spring onions or even 1/4 normal onion) finely sliced
30g grated parmesan cheese
1/4 cup olive oil + 1 tbs extra
2 anchovy fillets (chopped finely) - totally optional
Pinch of chilli flakes - to taste/optional
Mix 1/4 cup water and sugar together and sprinkle the yeast on top. Leave it in a warm place for 15 minutes until it starts to froth and bubble a bit.
Mix flour and salt in a large bowl and make a well in the center. Into the well pour the remaining 1/4 cup water, oil, and yeast mixture. Mix well and add a bit extra water/flour if the mixture is to dry/wet.
Knead well, roll into a ball and cover. Leave for 1.5 hours.
Preheat the oven to 190c.
In a large bowl mix together all the ingredients.
Halve the pizza dough and roll out each piece into a rounded rectangle kind of shape.
Generously oil a baking sheet and place one piece of dough on top.
Spread the filling over the dough, leaving about 3cms around the edge.
Place the second piece of dough over the top and seal the edges by pinching together.
Brush the top with the remaining oil.
Bake for about 1 hour until it's lovely and golden on top and a bit crusty.
Leave it to rest for 20-30mins before serving.
Eat and feel virtuous about pie!
Friday, September 18, 2009
Artichokes across the seas
The book I bought is My Cousin Rosa, by Rosa Mitchell. Rosa runs “Rosa’s Kitchen” or “Journal Canteen” or “that little place upstairs next to CAE”, and my lovely friend loves to lunch at Rosa’s – and I can’t blame her. Like the restaurant, Rosa’s book is full of homely, simple, rustic and delicious Sicilian recipes, and, like eating in the restaurant, the book makes you feel as if Rosa may really be your cousin, sharing family stories and memories about food and life growing up in an Italian family in Melbourne.
So with thoughts of friends far away, I bought some new season artichokes and set to work on a special Rosa recipe – Sicilian stuffed artichokes. Served at room temperature as part of a antipasto type meal on a warm Saturday evening with a glass of wine, these artichokes were delicious... perhaps almost good enough to bring a friend home to try a taste.
Carciofi ripeni - Stuffed artichokes
Adapted from My Cousin Rosa by Rosa Mitchell
2 globe artichokes (they should be firm with tight rather than wilting or separated leaves)
2 slices stale ciabatta or similar finely chopped or whizzed in the food processor into coarse crumbs
½ bunch flat leaf parsley finely chopped
1 clove garlic minced
¼ cup grated grana padano or similar
1 egg lightly beaten
1 lemon
Olive oil
1 can tomatoes
Salt and pepper
Preheat the oven to 180c
Trim off the top third of the artichokes and chop off the stem right at the base. Keep the top 2-3 cms of the stem and peel it - discard the rest. As soon as you’ve trimmed the artichokes and peeled the stem, throw them in a bowl of water with the juice of 1 lemon and the bit of reserved – they discolour very quickly and this will help to stop that.
In a small bowl mix together breadcrumbs, parsley, garlic and cheese.
Take one of the artichokes and roll it around on the kitchen bench with a bit of pressure from the heel of your hand to open up the leaves a little. This actually didn’t work particularly well for me, so I was just more forceful with the stuffing.
Take small handfuls of the breadcrumb mixture and stuff it in between the layers of leaves. You’ll have to really stuff hard. Try to get some in between each of the layers – or just distribute the stuffing throughout the artichoke as much as possible. Repeat with the other artichoke.
Heat some olive oil in a pan and dip the top of each artichoke into the egg. Quickly pop them egg-side down into the hot oil. This is to seal the stuffing in the artichoke and will only take a minute or two.
While they’re frying, empty a can of tomatoes into a small baking dish, along with a good grind of pepper and salt, and maybe a bay leaf if you’re feeling fancy.
Take the artichokes out of the pan and place them egg side up in the tomatoes. Throw the stems into the tomato, cover the whole lot tightly with silver foil and bake for about an hour, or until a skewer goes through the centre of an artichoke easily.
Eat with some crusty bread and a salad for lunch or along with some other antipasto delicious bits and pieces for a leisurely dinner.
Enjoy with good friends, near and far.
Monday, September 7, 2009
Springy soup
So before the warm weather starts in earnest (don’t get me wrong I’m very much looking forward to it), I would like to write a little bit about soup. There’s something deliciously special about soup – you sauté some onion or leek, throw in whatever you’ve got on hand, cover the whole lot with some stock and walk away. When you return you’ll have a flavoursome, comforting bowl full of dinner, and lunch the next day, and probably the next one as well.
The best soup I’ve ever eaten was the first time I ate Ribollita. I was in Tuscany with my family and we had gone for a drive, and gotten lost, quite spectuacularly lost, so we did what every self respecting person should do in times of despair... stop to eat. And eat we did, at a little roadside restaurant which served up hearty Ribollita and some of the finest hand-rolled Pici pasta this world has ever known.
Ever since that first mouthful of bread and olive enriched minestrone soup I’ve wanted to make my own Ribollita – but I’ve always felt a little silly because the whole point of Ribollita is to use left overs and stale bread and re-boil the whole lot. Also, one of the key ingredients in the soup is cavolo nero, which, until I started my bi-weekly shops at the Queen Vic Market, I had never seen in Melbourne.
The opportunity presented itself to make authentic Ribollita a little while ago when I made some boiled kale for dinner. I must be honest here and say that in my enthusiasm to shovel boiled kale and googy egg into my mouth I got a little lazy and left the left-over kale drowning in the still warm stock in the pot. Once I got around cleaning up the kale had become quite soft, and the stock was really green! The cogs in my brain started turning, and with a quick ingredient check, I knew what I’d be making for dinner the next night – real Ribollita with some left-over soupy kale and stale bread! Woohoo.
While I’m not going to claim it was anything like the soup I ate at that roadside Tuscan restaurant (could anything ever taste as good as it does when it’s eaten in the Tuscan sunshine?!) it was an excellent soup – and the perfect thing to eat when the Melbourne spring-time weather tricks you and turns cold again.
Ribollita
Olive Oil
1 brown onion finely diced
2 sticks celery finely diced
1 carrot finely diced
2 cloves garlic minced
¼ cup red wine
5 dried asian mushrooms reconstituted in about ½ cup boiling water and finely chopped
2 cans tomato
About 3 cups leftover cooked cavolo nero and stock
1 can mixed beans (optional)
1 piece parmesan rind (optional)
1 bay leaf
1 spring fresh rosemary (or a tsp of dried)
To serve
1 slice of day (or 2 or 3) old bread per person
Olive oil
Half a clove of garlic
Grated parmesan cheese
Heat a glug of olive oil in a big saucepan. Add the onion, celery and carrot and cook slowly until translucent but not browned (about 10 minutes.) Throw in the garlic and cook off for another couple of minutes. Turn up the heat a bit, pour in the wine and cook until it’s almost all evaporated. Throw in the mushrooms and reserve the soaking water. Pop all the other ingredients in the pot, bring to the boil, reduce to a simmer and let it go like that for about half an hour. Give it a stir every now and then – especially to make sure the parmesan rind hasn’t gotten all melty and stuck to the bottom of the pan.
When the soup is ready, grill one piece of bread per person under the grill or pop them in the toaster. While they’re toasting, remove the bay leaf, rosemary and parmesan rind from the pot. When the bread is toasted and still warm, rub both sides of the bread with a cut clove of garlic. Place a slice of bread in a shallow bowl, give it a seriously generous drizzle of olive oil and then ladle some soup on top.
If you’re me and would like to drink olive oil straight from the bottle, drizzle a bit more on top of the soup and then sprinkle on some parmesan cheese. Enjoy on a wintry spring day.
The other option is to break up the bread into thumb-sized pieces and throw it into the soup too. This makes for a very hearty, thick soup and is probably a good idea if you have left over soup AGAIN and even more stale bread the next day – it’ll change things up a bit and you can pretend you’re eating a whole new dish!
Sunday, September 6, 2009
Where does this taste like?
For me, fairy bread tastes like parties, Nutra-Grain tastes like my grand-parents' house in the country, tuna melts taste like Sunday night and pumpkin ravioli tastes like Milan.
When I was 19 I set off to Europe for what was meant to be a nine month adventure roaming the continent. Instead, within the first couple of months I had found myself a tall, dark and handsome Italian man and took up his offer to go live with him in Milan. While I didn't get the traditional European backpacker experience I had my heart set on, I did get an exciting but lonely, homely but unique experience of Italy - a country which, long after the relationship in Milan ended, stays in my heart.
One of my favourite authentic experiences was Sunday lunch at a friend's parents place. Each week family, friends and ring-in girlfriends who spoke no Italian would gather in Giorgio's parents' apartment in the middle of Milan and eat all afternoon, and often well into the evening.
The first time I went, Giorgio's mum was in the kitchen making pumpkin tortellini when we arrived. We were quickly ushered into the kitchen to assist with the pasta folding - although I tried my hardest, when it came time to serve the pasta, everyone could tell which tortellino was made by the clueless Australian girl.
The pasta course at Sunday's lunches changed most weeks, and I think I only had the pumpkin tortellini there one more time, but it stays with me as the best pasta I've ever eaten.
So, this week, armed with half a pumpkin, a lot of memories, and a desire to be part of the blogging Pasta Presto phenomenon hosted by The Crispy Cook, I attempted my own pumpkin ravioli (I chose ravioli rather than tortellini because no matter how many times that Italian mama showed me how to fold the tortellini properly, mine always seem to come out messy, lopsided or inside out.)
The verdict: it was delicious... and tasted like Milan.
Pumpkin Ravioli
The key to this recipe is the simplicity - so many filled pastas have fillers like breadcrumbs or even just too much ricotta - you really want the sweet roasted pumpkin to be the star here.
Filling
Quarter pumpkin (I used Jap because that's what I had but any sweet pumpkin will do)
100 grams ricotta
2 ammaretti biscuits crushed (optional)
Pasta
200 grams flour (preferably Tipo "00" flour or fine semolina flour but plain will work)
2 large free range eggs
1 tsp salt
Preheat the oven to 180c. Chop the pumpkin into wedges, sprinkle them with a little olive oil and pop them into the oven to roast (about 40 mins)
Mix the salt and flour together in a bowl or on the benchtop. Make a well in the center and crack both eggs into it. Beat the eggs with a fork, slowly incorporating the flour. When it becomes too stiff to keep mixing with the fork keep mixing with your hand and knead the dough for a minute or two. If you find the dough is too dry, add a teaspoon of olive oil or water.
Wrap the dough in plastic wrap and leave to rest for half an hour.
When the pumpkin is cooked through, remove it from the oven let it cool enough so you can handle it. Scoop the flesh out of the skin and into a large bowl. Pop the ricotta and biscuits in and give it all a good mash. You could food processor it, but a) I don't have one b) it's quite nice with slightly bigger bits of pumpkin.
Unwrap the dough, divide it into 2 balls and start working it through a pasta machine. While you can do this step by hand, it'd be very difficult to get the pasta thin enough and a complete pain - considering I bought a pasta machine from the Salvos for $10, they're not exactly an expensive addition to the kitchen. I like to work the dough through the first and second fattest settings on the machine about 5 or 6 times until it's smooth and elastic. Then keeping going up settings until the pasta is so thin you could read this recipe through it.
At this stage, pop a large pot of water on to boil.
Repeat with the other ball of dough.
At this stage you should have two long, thin, rectangular pieces of pasta. Put teaspoons of pumpkin mixture in a straight line down the middle of the sheet of pasta at about 3cm intervals.
Fold one half of the pasta over the filling and press down on either side of the filling to stick the pasta together and get out any air holes. Then fold the other side of the pasta over and repeat and pressing. This double fold method means that there's no annoying forking of each raviolo and they're much less likely to spill their insides during cooking. If you have a ravioli cutter then you can use that, or just a sharp knife to separate the ravioli.
Pop them all in the boiling water and cook for 3 mins.
Serve immediately with sauce of choice - I served mine with brown butter and parmesan cheese, which is the way Giorgio's mum served it, but it would be equally delicious with a simple tomato sauce.
Serves 2.
Monday, August 31, 2009
Eat it by the sea
a) buying the wrong cable for my camera
b) being busy
c) making some seriously average meals (think bland beetroot tart and crappy pasta - sigh!)
BUT a weekend on the surf-coast with the family for birthday celebrations has changed all that! It was a weekend of rain, roaring fires, trivial pursuit, snoozes on the couch and, of course, eating obscene amounts of food.
Due to a cold and a willing family of cooks I didn't actually cook anything over the weekend (except for a couple of flat loaves of bread - what's up with me at the moment!?) but I did eat! Apart from the home cook feasts of fresh pasta, cheese, salads, crumpets etc etc etc I also had the pleasure of eating at two wonderful surf coast restaurants - one an old favourite and the other a new revelation.
With the help of my mum's iphone I even managed to get some semi-decent pictures of the food - yay!
On Friday night we headed to our old favourite at Airey's Inlet - a la greque. It's a gorgeous, casual place run by Kosta Talimanidis (of Kosta's in Lorne fame) and his family.
The menu is simple and tasty but not very veggie friendly - although they do have some wonderful sustainable fish options like local flathead and whiting.
My family tends to order mains and lots of sides - so I ordered myself an eggplant pizza with mint, chili and kasseri and ate my fair share of silverbeet with gorgonzola and walnuts, green salad, lemon potatoes and fennel gratin.
The pizza was nice, but a tad dry and there was no sign of the aforementioned chili which probably would've probably given it the kick it needed to go from so-so to quite delicious.
The silverbeet was the highlight side. And not just because I think anything with gorgonzola is fabulous but because it was perfectly cooked so it still had a little bite, there were plenty of walnuts and just enough cheese to be a bit smelly and rich without killing the healthy taste of the silverbeet. Truly yumo!
The other sides were also very good but more unremarkable and the photos I have of the fennel in particular doesn't do it any justice.
So, with full bellies we trundled home for chocolate truffles, present opening, nougat, trivial pursuit and peppermint tea. Blissful.
When Sunday lunchtime rolled around we realised that, shock - horror, the cupboard was bare. Luckily for us, we had spotted a new little cafe in Jan Juc (kinda on the way home) that everyone wanted to try.
And wowee was it lucky for us - what a find!
Swell is a little cafe in the carpark of the Jan Juc shops but it serves up some seriously good quality, veggie friendly cafe food.
I realise that this post is getting entirely too long so I will just say one thing... Get the South Indian Veggie Burger.
Yes, it was as big as it looks and no you cannot eat it as a conventional hand-held burger and oh my was it delicious. The waitress couldn't tell us what the patty was made of but I guess it was a mixture of mashed chickpeas and veggies. There were lots of yummy Indian spices, some chutney, loads of salad and a splosh of tzaziki for good measure. One of the best veg burgers in memory.
Everyone else thoroughly enjoyed some wraps, mexican roti and one of the most impressive looking veggie breakfasts I've seen which included some scrumptious spinach and feta piklets! Everything was rounded out with a deliciously spicey chai, milkshakes, some coffees and then we all rolled home to Melbourne.
Overall a highly successful eating weekend.
I'm also back on the cooking bandwagon - so expect some pumpkin ravioli and apple cake to come your way later this week.
a la greque
60 Great Ocean Rd
Aireys Inlet
Swell
16 Princess Tce
Jan Juc
Monday, August 17, 2009
All things green and leafy
At school I was the kid who had hummus and carrot sticks instead of BBQ shapes, unsweetened muesli biscuits instead of Tim Tams and cottage cheese with mung-bean sprouts instead of, well, I don’t think there’s a junk food equivalent to that.
Even now, though I have a full-time job, live by myself and cook for myself most nights, every now and then I still catch my mother nodding encouragingly as I eat salad, exclaiming “Oh, delicious veggies, yummy healthy veggies” while my dad chimes in how eating healthy food makes your eyes sparkle – and who doesn’t want sparkly eyes!?
So, needless to say, I have been successfully brainwashed into healthy eating, so much so that when August at the market keeps presenting me with enormous bunches of dark green leafy kale, I can’t help but buy it and grin to myself knowing how sparkly my eyes will be when I’m done eating it.
I absolutely adore bitter dark green cabbage type veggies and when I read about Molly from Orangette serving them on garlicky toast with a fried egg on top, I couldn’t resist. So, this week as I walked home with a huge bunch of cavolo nero poking out of my back-pack I knew exactly how I wanted to cook it.
It’s really barely a recipe and, once again I must apologise for lack of photos. This time not for lack of trying but just because it was a very ugly dinner – ugly and delicious!
Oh, and don’t be put off by the fact that it’s boiled rather than briefly sautéed like greens are usually served – cavolo nero can stand up to and even benefits from a bit of boiling.
Cavolo Nero and Googy Eggs
1 big bunch of kale, trimmed, chopped into approx 1cm ribbons and washed well*
1 medium onion finely chopped
1 big clove garlic (or 2 little)chopped
Pinch chilli powder or flakes
1 litre of veg stock (I used homemade and I think it’s probably a good idea to use homemade or really super good stock because it flavours the kale)
2 free range egg
4 slices bread
Olive Oil
Salt
Grana padano
Gently fry off the onion in some olive oil, once it’s translucent but not brown, add the garlic and chilli and cook for a minute or two.
Throw in the kale and cook, giving it a good stir until it’s a bit wilted. It will seem like a lot of kale to handle in the beginning but it’ll shrink pretty quickly.
Pour in the stock so the kale is just covered, bring to the boil and reduce to a simmer – cook until the kale is nice and soft, but not disintegrating into green mush – probably about 30 mins. When it’s a couple of minutes off being done add salt to taste – it’ll need a fair whack of salt, so don’t be shy!
While you’re waiting for the kale to cook, toast 2 pieces of bread per person, while still hot rub them with a cut clove of garlic and brush on some olive oil. Also, fry the eggs as you usually like eggs (in butter or oil, sunny side up or down) just make sure the yolk stays nice and googy.
Place the toast in a wide shallow bowl and when the kale is ready pile it, along with some of the juicy, kaley, oniony stock onto the toast and top with the fried egg.
Grate some Grana Padano (or equivalent) over the whole mess and enjoy sparkly eyes for at least the next 48 hours.
Serves 2 – or one hungry person plus left over boiled kale
*Once the kale is chopped and washed, if you dry it well you can pop it in the freezer where it will happily live for a week or so and come out ready to be popped straight in the pan!